Pedes Anatomia – webinar
27 Μαΐου, 2020 @ 4:00 μμ - 7:30 μμ
Pedes Anatomia
Course fee: 180 euro (special price for our first course 130 euro)
For those who have attended Orthopedic Reflexology Courses in the past may
take advantage of a 50% discount.
For those who will also attend in the future Orthopedic Reflexology
training in Greece (Spring or Summer options) they are eligible to a 100%
refund of the Pedes Anatomia fee on the fee of the Orthopedic Reflexology
training.
 Pedes Anatomia is a training module of Orthopedic Reflexology, unique in that the student engages in a 100% hands on learning process through artistic creation of the anatomical parts of the feet. Meaning the intrinsic muscles, ligaments, tendons, arteries, bones and nerves. The art mediums used may be any of the following:
- Air drying clay
- Homemade play dough
- Commercially sold play-dough
- Drawing pencils, markers or pens or paints/brushes
Learning anatomy for most is a challenge on its own requiring amounts of energy for memorization; the challenge is greater for parts like the feet and hands that contain many other smaller parts. Yet in many of these cases this is still knowledge based on memory and often fades away over time. There exist three different learning styles, them being visual, auditory and kinesthetic or tactile learning. Though the statistics vary when we speak about training in general, when it comes to anatomy auditory is at its lowest, visual average and kinesthetic at its prime, something obvious when you think of dissection labs or massage/reflexology/bodywork training.
But even then the anatomy of the feet is neglected, possibly due to the many small detailed structures and the four layers of intrinsic muscles. This is evident when one goes through anatomy atlases or sports kinesiology books; in most of them put simply the intrinsic muscles of the feet are absent. This absence is also present in massage, reflexology or other bodywork trainings. And further on this continues in every day practice, think of how many foot problems are diagnosed as “plantar fasciitis”, the answer is most of them.
Pedes Anatomia, is an online training module that combines all three learning styles but engages the student at the comfort of their home and at their free time to emphasize on the kinesthetic and tactile style. This is accomplished by the student turning into an artist forming shaping and eventually creating the anatomical parts he has just watched on the training video and following the directions he has heard.
 Incorporating mediums like clay, play dough and drawing the student can now learn by engaging and creating in an artistic, playful and carefree environment something as challenging as feet anatomy. For the brain this procedure will be new and fun, an exploration! There will be creational repetition in order to obtain the desired or satisfactory artistic result on any given anatomical part. And once the student is satisfied with his/her creation the knowledge will have been absorbed and never forgotten, stored in our long term memory because the student created it with their own hands.
This creation will happen through fine movements from our hands intrinsic muscles which in turn will engage the higher brain centers involved in such movements, through art we will be able to express and search our emotions thus engaging our mid brain. Through creative repetition every part will be created better and better engaging autonomic and automated centers like the brain stem and cerebellum. This knowledge eventually will be stored in our hands and in our nervous system for life, creating confidence for life on such a challenging topic.
The average Reflexologist most of the time applies techniques to the feet through projection of an anatomical map of the body on them in a smaller scale of course. We all began with one map, a basic one and from there on started to learn other maps or systems to project on the feet. A wonderful complement to this traditional training would be to train in Pedes Anatomia because:
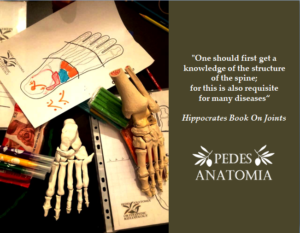
- During the creation of the parts in the training videos I talk extensively about the reflexology correlations to that given part exactly as I do in my three day Orthopedic Reflexology training, something very much appreciated by all participants. So it’s always Reflexology. Also discussed are Chinese meridian associations and above all Hippocratic meridian.
- Eunice Ingham’s theory of Reflexology effectiveness is based on the breaking down of accumulated uric acid restoring blood flow. From her time a few other theories have surfaced explaining how Reflexology works, for example irritated nerve endings, calcifications of connective tissue, energy etc. Hippocrates introduced science to the art of medicine and we will approach all of these different theories “of action” of Reflexology through the anatomy. Hippocrates contributes to these theories because he gave us specific detailed guidance on the effect manual techniques have on tissues and joints depending on the two variants amount of pressure and time of application. You will learn these guidelines and be in a position to apply them on the tissues of the feet where your reflex charts are projected.
- You will teach yourself to think and project our reflexology maps on the feet in three dimensions as opposed to one or two dimensions as our charts are usually made.
Because organs and muscles overlap on the body, the same happens on the feet when we project the body on them, after all there are five layers of tissue in the feet! So once the training begins you will start applying techniques varying in depth on any aspect of the foot to reach the reflex of interest.
- You will teach yourself which of your wonderful techniques to apply depending on the structures you are touching on any given part of the foot, a joint cannot have the same requirements as a muscle or a tendon can it? Once you know what you are touching you will know which techniques are best suited.
- Though experimenting in my trainings on and off with mediums such as clay and drawing, this course came to life during the Covid-19 lockdown. I did not have my training materials with me at home and due to isolation I could not get them so I had to improvise. Through improvising I discovered I was making art in a way, and through art in this difficult period for all, my feelings surfaced I could express myself; I found a way to heal and support myself.
Pedes Anatomy are Greek words and would translate as follows:
Pedes mean feet, or to stand on ones feet, and lastly but importantly to bind and brace, something you will be doing with your hands, you will be binding creating the structures of the feet.
Anatomia is made up of the words ana– meaning “up” but is also used to show a complete movement from beginning to end, for example inhale-exhale would be respiration, in Greek ana –pnoe.
-tomia means to “cut or incise”
So Pedes Anatomia literally means to cut up or to take apart the feet but also to put the parts together again. So Pedes Anatomia describes the art and science of studying the different parts of the feet through the process of dividing and uniting them.
Upon successful completion the participants will be described as
Pedes Anatomos – Feet Anatomist an expert in anatomy of the feet.
Introductory video
Materials for Pedes Anatomia
What is included? Starter pack
- The Pedes Anatomia textbook where all relevant anatomical information is described and accompanied with anatomy maps, in digital form. Students will print this out or read from their device.
- The students will receive in pdf format the Pedes Anatomia foot skeleton charts (4) and a graph measurement for them to print out. The charts are to be printed on plastic sheets for clay and on paper for drawing or practicing.
- Introductory video on clay instruments, our work station, how to work with clay, how to preserve it, suggestions on how to even make your own clay if you like.
- Webinar lesson on the bones and articulations of the feet. This will be the basis the foundation of our further training because on one hand there will be a lesson on creating the foot skeleton and on the other hand almost all origin and insertion areas of muscles, tendons and ligaments are on the bones. This video will also be followed by a lesson with valuable techniques to use immediately in your Reflexology practice. (Notice: this will be the only hands on demostration of techniques, upon creating the intrinsic muscles I will be describing how to work on them the best way).
- Introductory video lesson on paragraph 17 form Hippocrates book “The doctor’s office” where we lay out his guidelines on the effect of manual techniques dependant on amount of pressure and duration of application. Besides creating muscles (or other structures) to learn them it is important to know how to work on these muscles especially since the reflexes are there.
Paragraph 17 serves this purpose and research of recent years proves Hippocrates was ahead of his time.
- Lessons where Spiros Dimitrakoulas will create the all the major structures with you and guide you through the anatomy, physiology, Hippocratic meridian and reflexology correlation of any given structure.
What you will need to prepare at home.
-
- Air dry Clay (two colors, mostly red for muscles and white for tendons & ligaments), or homemade play dough (there are various easy to do recipes found on the internet), or any children’s play dough red and white colors preferable. It is ok to use other colors.
PlayDough Recipe without Cream of Tartar Ingredients:
1 cup Flour
1/4 cup of Salt (CUP not table or teaspoon or you will end up with a stick dough)
1 tea spoon Vegetable oil
Food coloring (gel food preferably)
Scent ( if you want it to smell nice)
How to make: Step 1 : Place the flour and salt in a bowl
Step 2 :In another bowl mix water and food coloring
Step 3 : Mix the 2 bowls together and stir well, keep adding flour if it gets too sticky
Step 4 : Add vegetable oil at the end and store it in a container.
Just a note this play dough recipe can last for few weeks. It can be stored in the fridge. This playdough recipe can be a little sticky if you don’t use enough salt.
-
- One air-tight container to preserve your clay.
- Plastic food wrap (saran) for preserving your dough and for applying on the foot model before you apply the clay or dough (keeps the foot model clean this way)
- Plastic sleeves to put in the plastic sheets and the graph so as to create on the sleeve and preserve the sheets.
- For those into details. One comb for muscle fiber details, toothpicks, a cylinder object like a marker to use as a rolling pin.
- If you can purchase a simple inexpensive clay sculpting set that is great, otherwise use various simple “tools” that can be found at home like an old credit card to use as a spatula, a brush and cup of water at your station to glue structures together or to create some details.
- A stable flat surface to work on, good lighting
- Five different colored pipe wires or other similar material, we will use these for the tendons artery and nerves that enter the foot.
- Some white tape for retinacula, scotch tape to keep things in place for those with the foot model.
- A rag to wipe our station and hands.